Pasta e Piselli
Prep Time: 10 minutes
Cook Time: 20 minutes
Total Time: 30 minutes
Difficulty: Easy
Servings: 4
Introduction
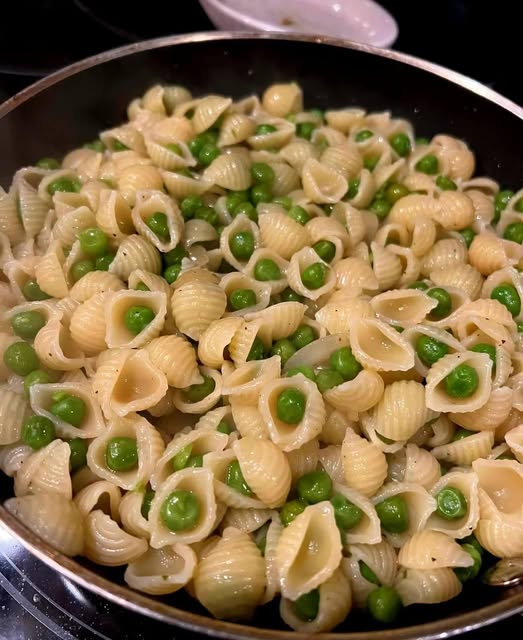
Pasta e Piselli, or pasta with peas, is a traditional Italian dish rooted in Neapolitan home cooking. It’s one of those meals that proves simplicity is at the heart of the best Italian cuisine. Made with a short pasta like ditalini, sweet green peas, onions, and just a few pantry staples, it’s incredibly flavorful for such a humble combination of ingredients.
What makes this dish stand out is the brothy consistency that sits somewhere between a soup and a saucy pasta — a classic example of the Italian style known as “pasta risottata”, where pasta is cooked in just enough liquid to soak up all the flavor.
It’s quick, hearty, vegetarian (and easily vegan), and ideal for weeknights when time is short but taste matters. Whether you grew up eating it or are discovering it for the first time, Italian Pasta e Piselli is soul-satisfying, comforting, and incredibly easy to prepare.
Ingredients
Here’s what you’ll need to make an authentic Pasta e Piselli:
Core Ingredients:
- 1 tablespoon extra virgin olive oil
- 1 tablespoon unsalted butter (optional but adds richness)
- 1 small yellow onion, finely chopped
- 2 cups green peas (frozen or fresh)
- 1¼ cups short pasta (ditalini, small shells, or elbow macaroni)
- 4 cups vegetable broth (or water, for lighter flavor)
- Salt and black pepper, to taste
- ¼ cup grated Parmigiano-Reggiano or Pecorino Romano
- Fresh parsley, chopped (for garnish)
Optional Add-Ins (Choose Your Style)
- Garlic: Add 1 minced clove with the onion for extra depth.
- Pancetta or prosciutto: Fry a few bits for a non-vegetarian version.
- Chili flakes: For a subtle kick.
- Mint: A few fresh leaves for a Sicilian twist.
- Lemon zest: Brightens up the whole dish, especially in springtime.
Kitchen Tools Needed
- Medium soup pot or deep skillet
- Wooden spoon
- Measuring cups/spoons
- Grater for cheese
Instructions
Step 1: Sauté the Aromatics
Heat olive oil and butter in a medium pot over medium heat. Once hot, add the chopped onion and a pinch of salt. Sauté for 4–5 minutes, until the onion is soft, translucent, and fragrant. If using garlic or pancetta, add them now and cook for another minute.
Step 2: Add the Peas
Stir in the peas, and cook for 2–3 minutes until they begin to soften and brighten in color. If using frozen peas, no need to thaw first — just add them straight from the freezer.
Step 3: Add the Broth
Pour in the vegetable broth (or water), bring it to a gentle boil, and season lightly with salt and pepper.
Step 4: Add the Pasta
Once the liquid is bubbling, add the short pasta directly into the broth. Stir occasionally to prevent sticking. Allow it to cook uncovered for about 10–12 minutes, or until the pasta is just al dente. The starch from the pasta will thicken the broth slightly, giving it a rich, almost creamy texture.
Step 5: Final Seasoning
Taste the pasta and adjust salt and pepper if needed. Turn off the heat, and stir in the grated cheese for a creamy, savory finish. If you want a looser, more soup-like dish, stir in a splash of hot water or broth. If you prefer a thicker, creamier version, let it sit a minute or two before serving.
Step 6: Garnish and Serve
Ladle the Pasta e Piselli into bowls. Garnish with more grated cheese, a drizzle of olive oil, and fresh parsley or mint, if desired. Serve hot.
Tips & Tricks for Success
- Don’t drain the pasta! Pasta e Piselli is all about the starch released into the cooking liquid. It gives the dish its signature velvety texture.
- Use good broth. A high-quality vegetable broth makes a big difference in flavor. If you use water, consider adding a bouillon cube.
- Use small pasta. Ditalini, tubetti, or baby shells hold the peas well and create the perfect spoonable bite.
- Finish with butter or cheese. These small additions round out the flavors beautifully.
- Double the peas. If you’re a pea lover, add more! The ratio is flexible.
Storage & Reheating
To Store:
Let leftovers cool completely, then store in an airtight container in the fridge for up to 3 days.
To Reheat:
Reheat gently in a saucepan with a splash of broth or water to loosen it. Microwave in 30-second increments, stirring in between.
Freezing:
This dish is best enjoyed fresh, but you can freeze it in a pinch. Just note that the pasta will soften more upon reheating.
Nutrition Information (Per Serving – Approximate)
| Nutrient | Amount |
|---|---|
| Calories | 340 kcal |
| Total Fat | 10g |
| Saturated Fat | 3g |
| Carbohydrates | 50g |
| Dietary Fiber | 5g |
| Sugars | 4g |
| Protein | 12g |
| Sodium | 420mg |
Nutrition will vary based on your cheese, broth, and pasta brand. Use whole wheat pasta for added fiber, or gluten-free options as needed.
Serving Suggestions
- Crusty bread: Serve with Italian bread or garlic toast to mop up the broth.
- Side salad: A light arugula or mixed greens salad balances the richness.
- Wine pairing: Try a crisp white wine like Pinot Grigio or a light red like Chianti.
Regional Origins & Cultural Notes
Pasta e Piselli hails primarily from Southern Italy, especially Naples, where cucina povera (“poor kitchen”) dishes reign supreme. These recipes emphasize flavor over flash, proving that with just a few ingredients, you can create something extraordinary.
In some homes, this dish is thick like a stew, while others serve it brothy, more like a soup. In Sicily, it’s not uncommon to find mint added to the mix, while in other regions, prosciutto ends or guanciale give it a meaty depth. The beauty lies in its adaptability — this is a recipe passed down, tweaked, and loved by generations.
Conclusion
If you’re looking for a quick, affordable, and delicious dinner that still feels like it came straight out of a cozy Italian kitchen, Pasta e Piselli is your go-to. It’s the perfect blend of simplicity and soul — a gentle reminder that sometimes, the best meals come from the humblest ingredients.
Try it once, and it just might earn a regular spot in your weekly meal rotation.